|
I always have on hand these plastic silver cups because they are so versatile. For thank-you's I place a single 4'' succulent in them. For a wedding we did last year, each table had two of these silver cups filled tightly with purple carnations. Carnations look so good all jammed up together. It almost resembles one ruffley flower. For a holiday party, this is a great way to decorate your home or give to the hostess with a bottle of wine. For each one, you need: 1 silver cup 1 bunch (approx 10 stems) purple carnations Fill cup half way with water. Cut the stems at once length, about 4'' long. Place entire bunch inside vase and create a round shape by gently moving them around. Pat down with your palm. Voila! Easy as that. 

Photo from ultrapom.com
0 Comments
White Elegant Pumpkin: 1 white pumpkin 1 white cakestand, plate, or tray 2 bunches white dahlias Cut out center of pumpkin, line with plastic bag, or place a shallow bowl or glass inside. Fill with water. Cut stems of dahlias one length so that the flower rests on the pumpkin. Tie stems with hair band, and place inside water. Okay to refrigerate to keep fresh. 
Photo taken from Martha Stewart. All rights belong to Martha Stewart.
You can apply this technique to any type of produce including watermelons, gourds, melons, etc. I usually place my arrangement in the fridge for a few hours or overnight if it's really hot out. Avoid placing hydrangea in the home fridge (unless it's the mini green ones), or any super delicate flower, as the temperature may be too cold for them. Dahlias, roses, tulips, and anything hearty will be fine.
The bride, owner of Nolan Jewelry, was a crafty DIY bride, which makes sense. But she was smart enough to know to not do her own bouquet for her wedding. A big no-no in my book. It really takes way longer than one would think. Sometimes we remake the bouquet 3 times to get it right, and I know I wouldn't want to be fumbling around the day before my wedding. This style however, of wildflowers, is the easiest. 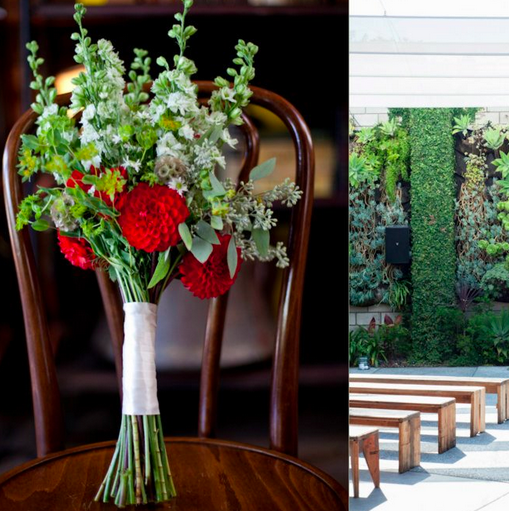
Summer 2012 Weddings Above: At Smog Shoppe. Photo courtesy of Maya Myers Photography. Red dahlias, brown scabiosa pods, green bluperum, green seeded eucalyptus, white larkspur. Below: At Rancho Del Cielo. Photo courtesy of Beautiful Day Photography. A mix of pinks, purples and whites: snapdragons, stock, larkspur, lisianthus. 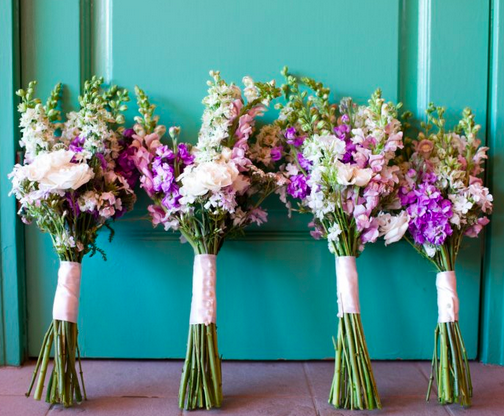
For Wildflower Bouquets You Need:
1 bunch larkspur or stock 1 bunch dahlias or lisianthus 1 bunch snapdragons 1 bunch wild greens Clean all flowers and cut really long stems to about 16-18'' so it's easier to work with. Divide the flowers into the number of bouquets and separate bunches. Using the spiral technique (attend my class if you need to learn;) take one of each type of flower in your left hand, and continue to add in one type of flower, alternating 1-2-3-4, so that you get a nice mix throughout. Secure with floral tape, duct tape, whatever you have that will hold it! Add ribbon and secure with pins. Cut stems all same length and place in water. Voila! Soft, romantic wedding aisle flowers that can be easily attached to a chair, or hung from doors for a sweet touch. So easy, each one takes under 5 minutes to make! You can make these well in a week advance.  Step 1: Roll construction paper into a cone.
Step 2: Tape the side, or staple the top. Step 3: Wrap a paper doily (you can buy packs at any craft store) around and tape. Step 4: Hold punch the sides Step 5: String sating ribbon through the hole and tie a knot. Cut off any extra ribbon. Step 6. Put baby's breath inside. Once bunch should make 5-6 cones. Baby's breath doesn't need water and dries as is, making this a great economical and heat-resistant flower. Definitely a new trend that's still thriving this season. Enjoy!
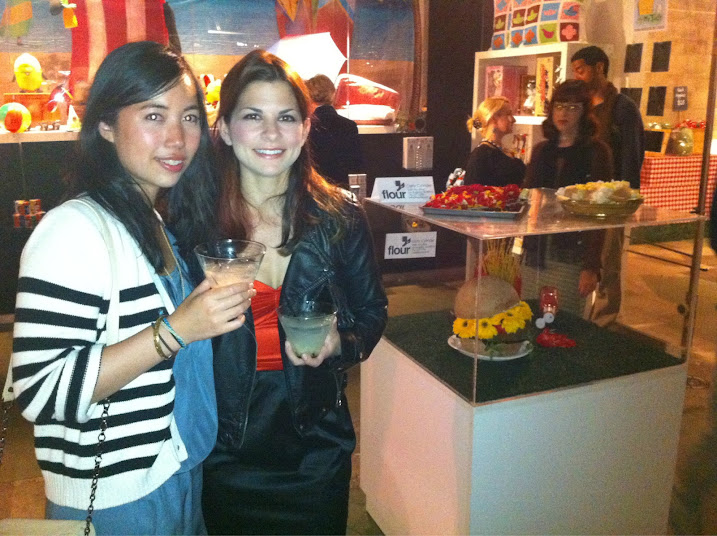
As you know, I participated in my first gallery show at Royal-T in Culver City this past Friday. What an amazing experience. Now all I want to do is destroy my kitchen, cover it in paint, plaster, clay and flowers, and create little sculptures all day long. When I arrived, two hours after the press VIP opening (since I was setting up a wedding during that time), I was shocked to see that they put a different florist's name on my work!!! Can you imagine?! My blood, sweat and tears, pouring over these little sculptures for the past week. I was devastated. Plus my apple pie and pizza were nowhere to be found. They did take down the other person's sign immediately and put up one for me. So, How Did I Do That?! 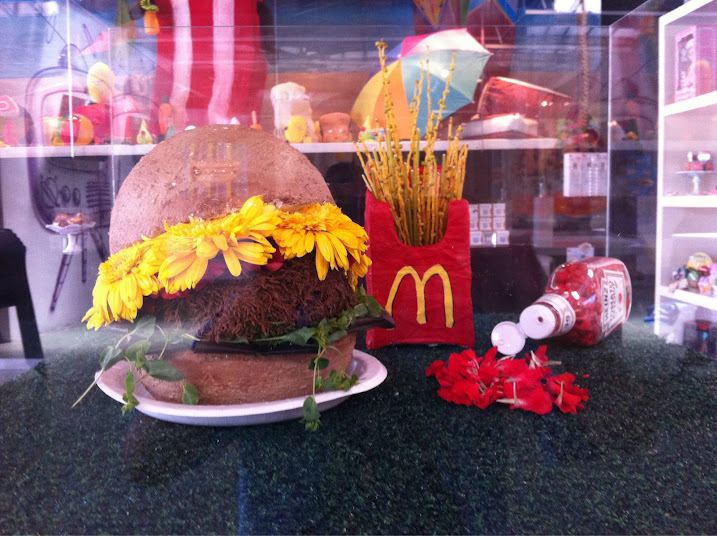
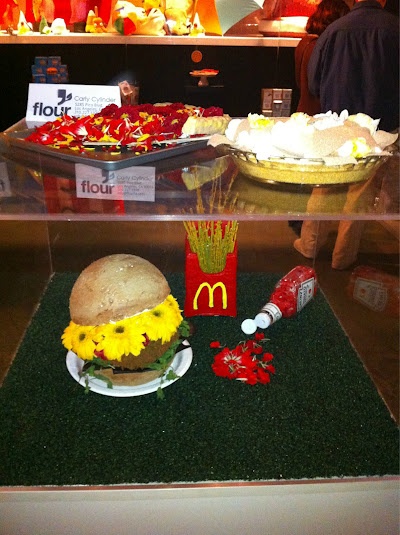
Above: Hamburger - Styrofoam, molding paste, gerbers, ranunculus, moss, bluperum, ti leaves. French Fries: Paper mache, branches Ketchup: Carnation Petals Below: Donuts - Clay, molding paste, carnations, leaves, snapdragons, waxflower 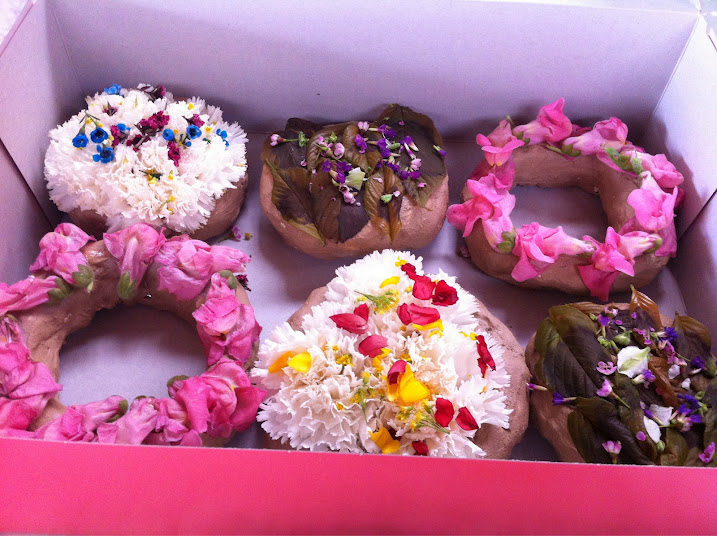
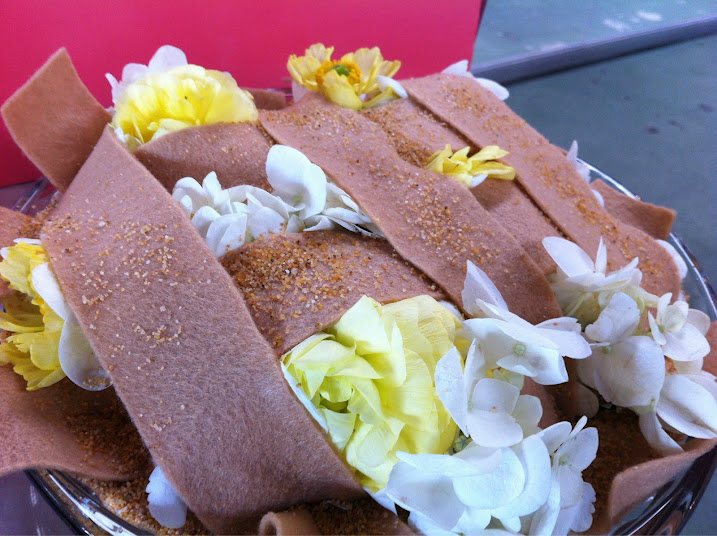
Above: Apple Pie (Seen in LA Weekly last year) - Felt, sand, ranunculus, hydrangea 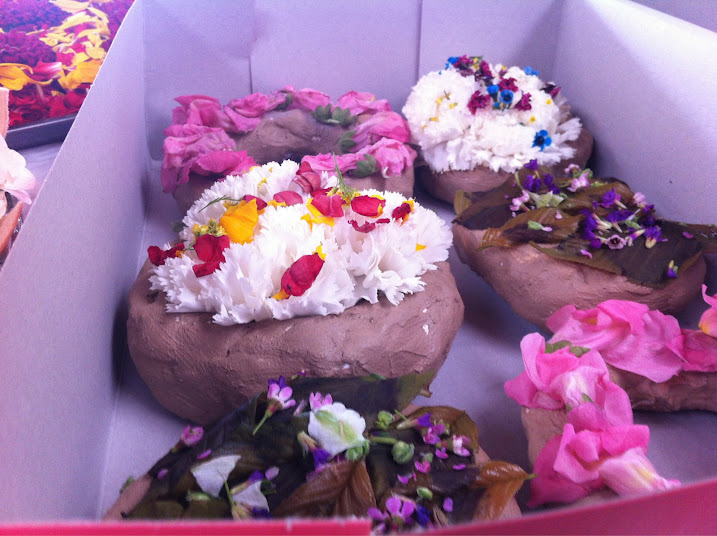
This was the wedding where the bride contacted me a few weeks before her nuptials to figure out the flowers! I actually loved the challenge and speediness of it. She literally gave me somewhat of an idea and palette to work with, and let us do the rest. Kinda perfect actually. Laura said, purples, yellows, oranges, and greens, and lots of texture. For her bouquet, I wanted it to stand out, and be a bit more romantic than everything else. Stay tuned for the whole album, which will be posted on the website soon. 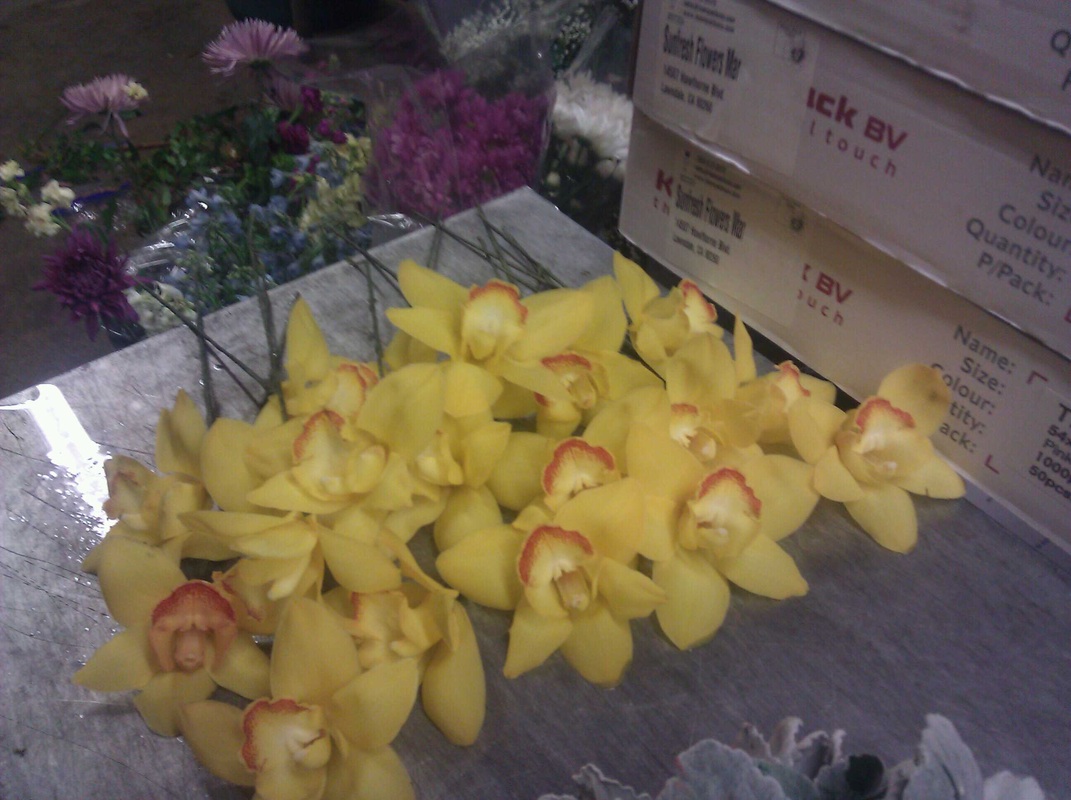
We tend to wire a lot of orchids. I find it therapeutic. Well, the first twenty or so. 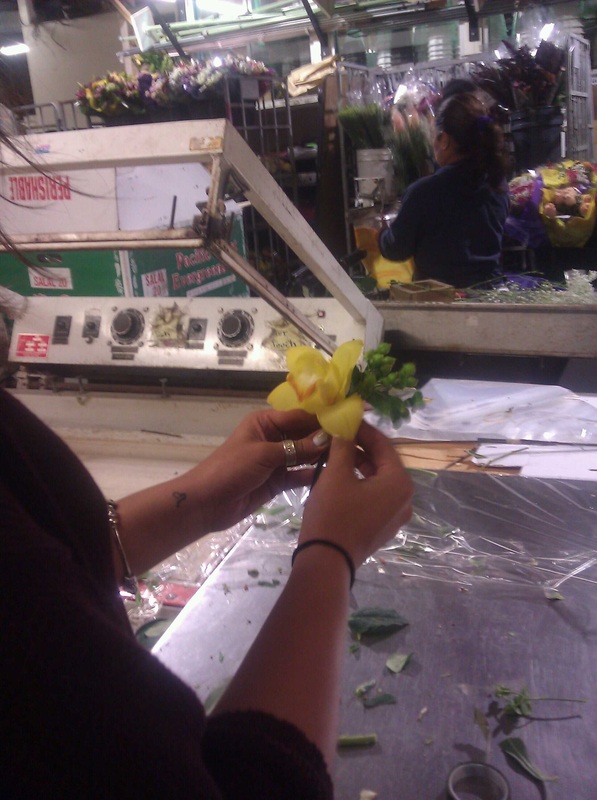
Putting together a boutonniere. 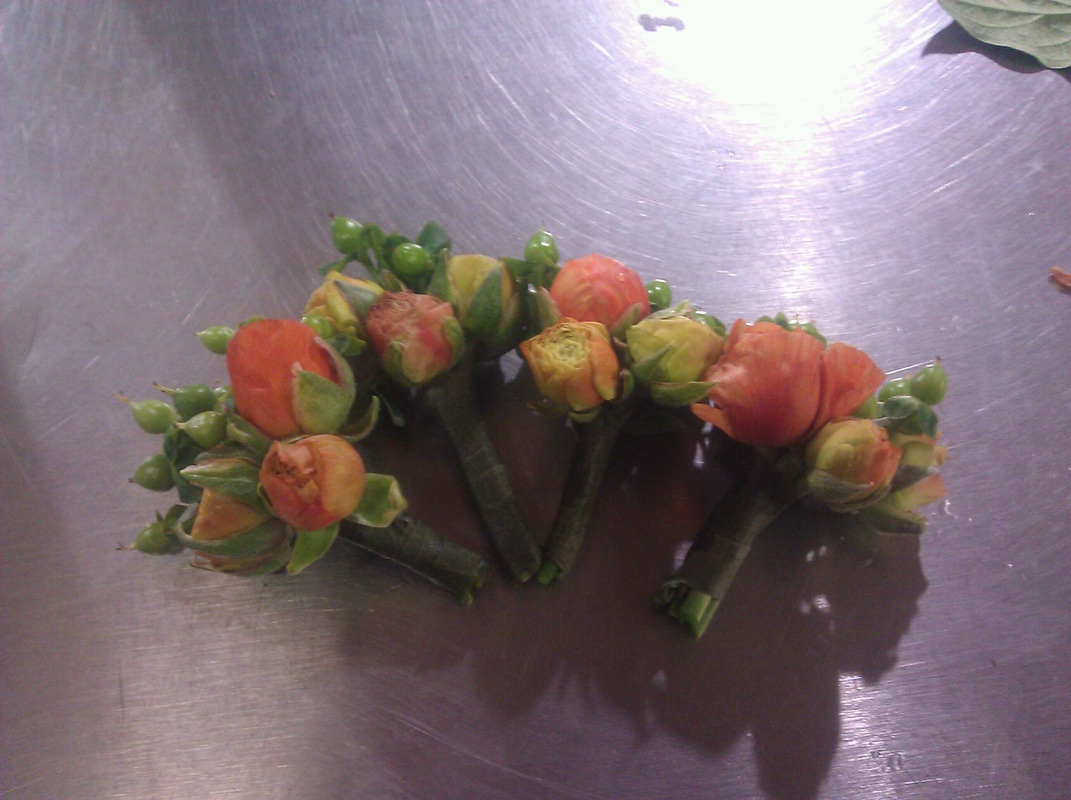
Small orange ranunculus with green hypericum (aka coffee bean). We wrapped them in satin after. 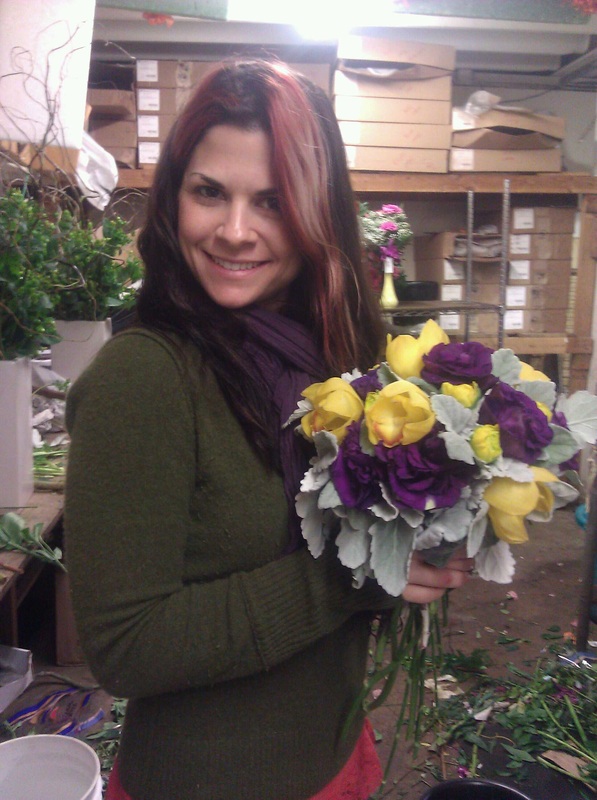
How did I build the bouquet? For this I created a WHOLE NEW technique!!!! Instead of spiraling, I made a nest of the dusty miller, and then inserted the purple lisianthus, orchids, and yellow ranunculus. It was much easier to do it this way since dusty miller has short stems. After playing around with it, I used floral tape to secure it tightly and finished with ribbon. 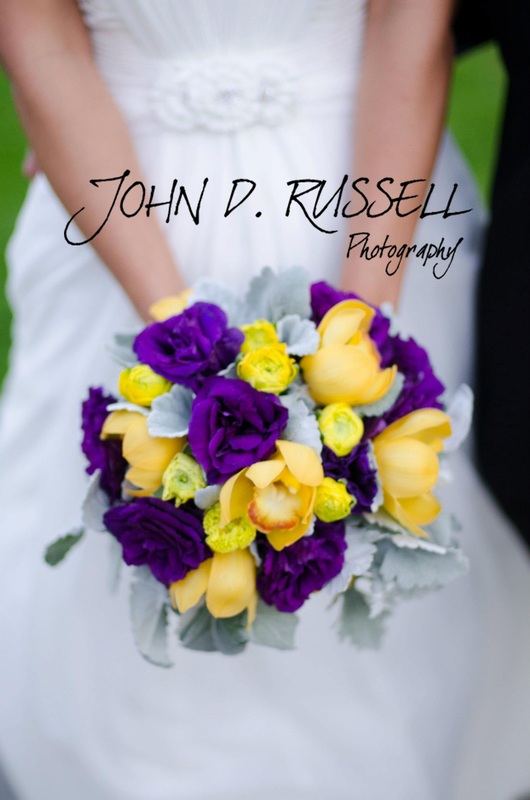
Voila! Good, no great, photos really make a HUGE difference. Bam!
Utterly Engaged hosts an annual party where they have a tablescape competition- pretty cool stuff. This year, the theme was to chose two countries that Shelter Box donates to. UE supports this charity, which is pretty awesome, a total win-win. If you haven't heard of Shelter Box, be sure to take a look! I originally met the gals of Gather Events through 100 Layer Cake, so when they contacted me to do the florals for their table, I immediately said YES! Their inspiration board was so pretty. Literally when I opened the PDF, I said aloud to no one in particular, Wow, this is so beautiful. They chose Turkey and Australia with a palette of oranges and blues with lots of texture. Turalia had espresso beans in votives, tassels attached to menus, cork charges, Turkish towels - I mean, the whole shabang. Sweet and Saucy created awesome mini cakes that represented the Turkish cityscape. I loved the whole idea, incorporating cake and flowers on a candelabra centerpiece- hello sensory overload. They asked that the candelabra centerpiece represent the Australian desert, with a lot of oranges, using protea and air plants. It was SUCH a fun challenge. So... how did we do it? 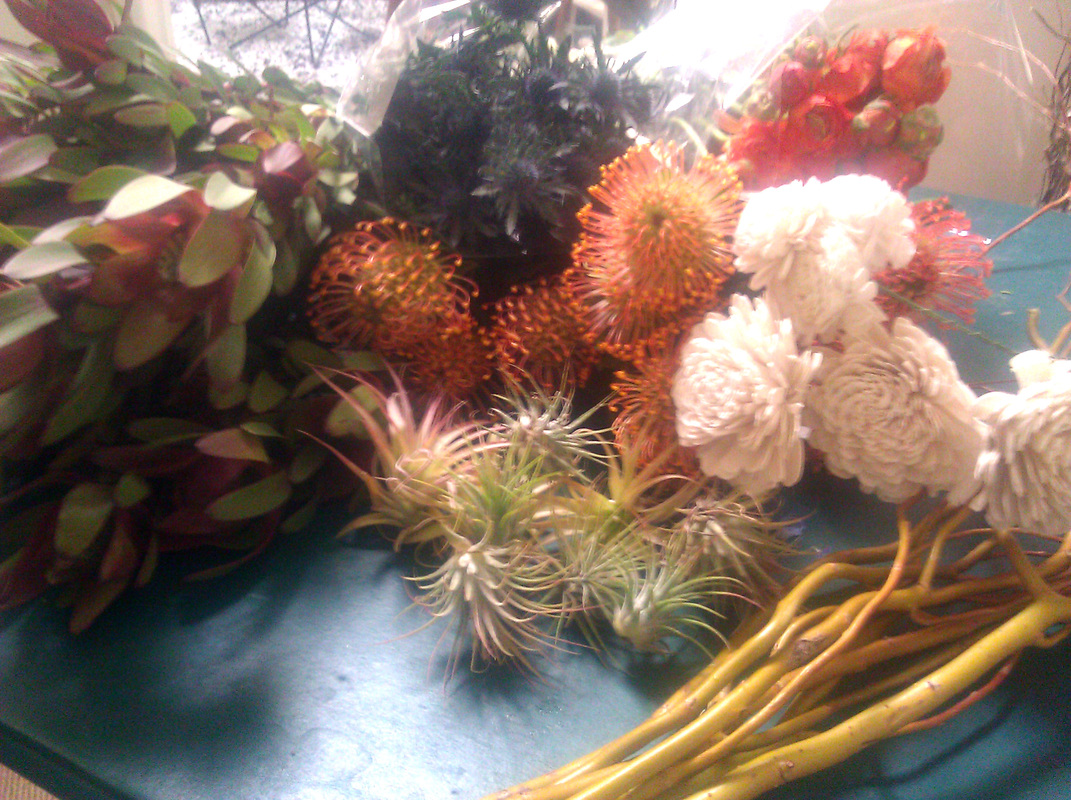 Kristine and I used protea, air plants, orange ranunculus, sunset safari (K kept calling it sunrise, ha!), balsa wood flowers, and blue thistle to tie in the blue and desert feel. When I saw the orange reindeer moss, I just knew that this was going to come together exactly as we envisioned. Now, that doesn't happen exactly like that all the time, and we created this entire piece relatively fast. 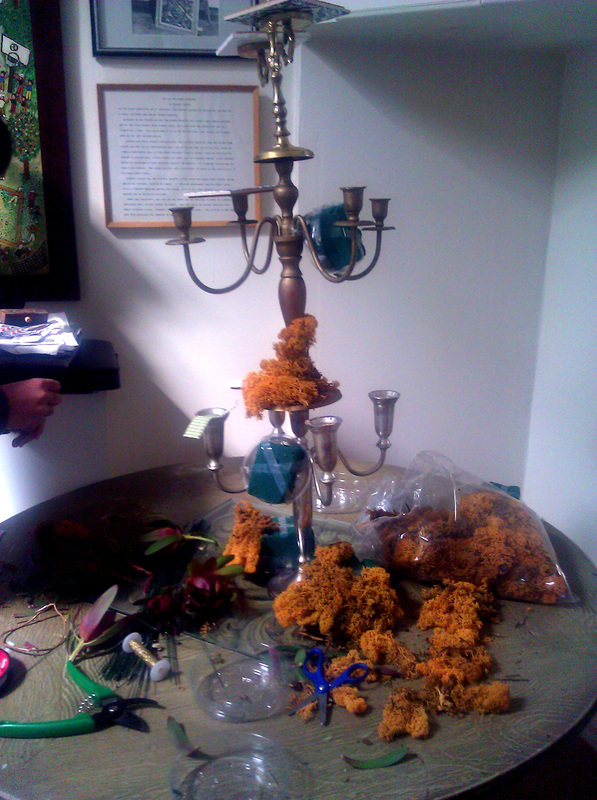 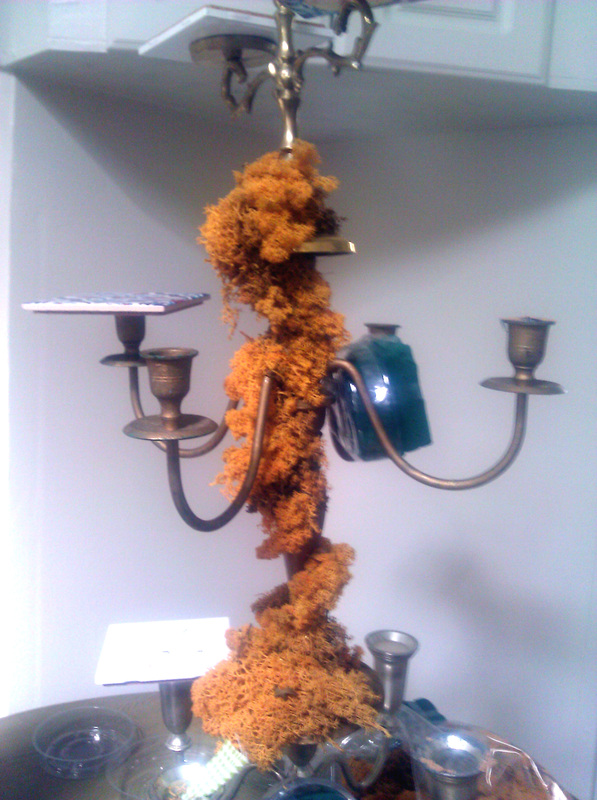 The girls of Gather really put the word design into event design. They came up with SO many details it's unbelievable. They found three separate candle holders and had them welded together and then attached tiles, both white and patterned. Very creative! First, we attached small patches of floral foam. Then, we placed the moss all over to create a base using very thin gold thread wire. 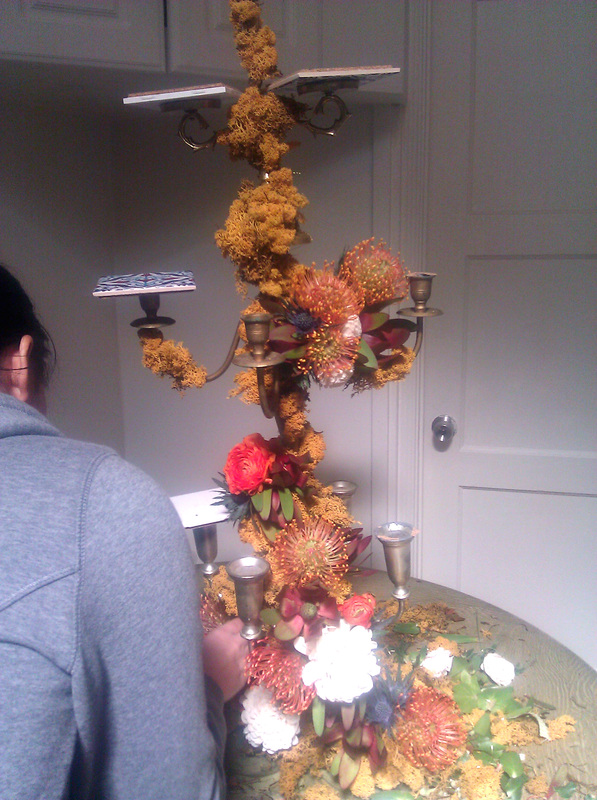 We placed the flowers into the foam, and then created small bunches and wired them on to the places that had blanks in them. I put some water tubes on the delicate ranunculus and then concealed it with more moss.  Here's Robin and Sarah securing the candelabra at the venue. 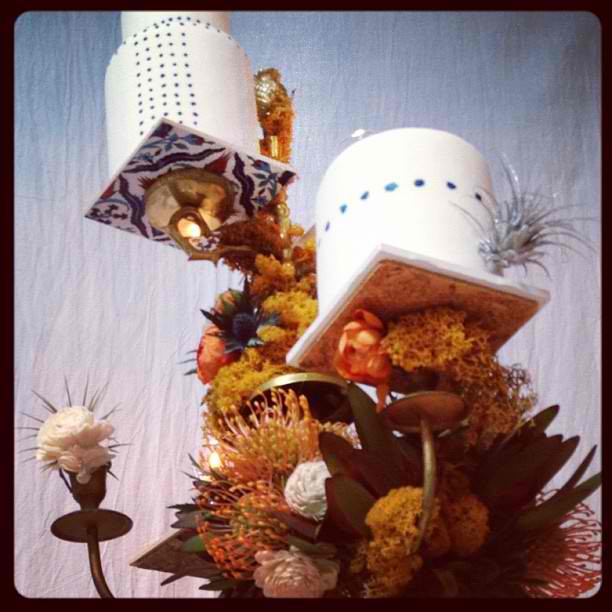 A nice close-up Instagram photo. Lots of details! We put some small flowers in the candle holders. 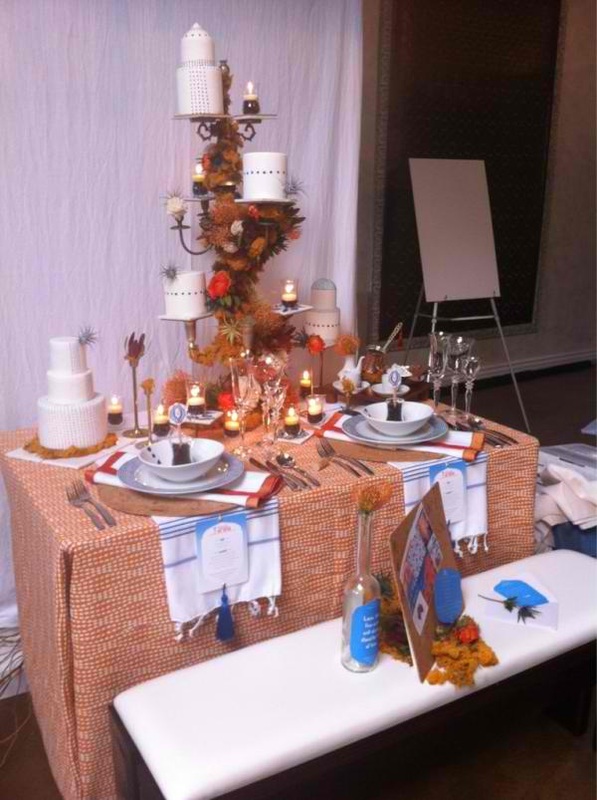 Voila! Our beautiful "Turalia" tablescape. So how did we place? We didn't! At. All.
Yes, you read correct. The other booths were adorned with crystals and feathers, and all of that stuff that isn't really me per se. I felt like Simon Cowell or Tom Coliccio secretly screaming, Don't do it! Don't add one more vase, one more bunch, one more whatever it is to your table. You are going to ruin it! Okay, I'm being a bit harsh, there were some tables that were really cool and creative. My favorites included a butterfly backdrop (didn't place), a beach type theme (didn't place), and some creative bouquets, including one inspired by a ski cap. Of course Kristine and I were bitter. Wait, what?! I felt like a mom on Toddlers and Tiaras freaking out that my little darling didn't win. The Gather girls were like, ah well, lets go dance. Much classier. Then again, when I used to nanny I'd make the kids play Connect Four until I won (they would laugh, but oh yes, I was dead serious). I'm just slightly competitive. A week goes by and then I get a text from Robin, with really good, no GREAT news! And it was an analogy for life, or something like that - just when you think something's over, it turns into something even better. Stay tuned. Well, well, a day late and a dollar short. Okay I know the Oscar's were yesterday, but c'mon I couldn't be writing and missing all the fashion. Hands-down my favorite dress was the LV Michelle Williams was wearing. And you know my friend Caley, from my previous post, well she dressed the one and only Gwenyth Paltrow - who looked amazing. Yup, my friends are going places... or went places... or are there at the places. So if you did have an Oscar party I hope that you got a little creative with it! Here's how you can make this arrangement at home in 5 easy steps. 
1.) Use a square vase, preferably silver or mirror, but you can use whatever you have around - glass, ceramic, etc. You can also buy these at a craft store like Michael's or my fav place to find treasures is at TJ Maxx home goods, etc. 2) Buy a piece of floral foam from any florist or at the grocery store. This is not eco-friendly, so you can use tape instead, but really floral foam is the way to go. I call it training wheels for flowers. 3) Insert 3 rows of 3 roses in each row. That's a mouthful. Cut the stems short, about a few inches long and insert so that the rose head rests on the foam. If the guards around the roses, the green bits of stem that support the rose, are too long, just pick them off. Also remember to remove any unsightly brown petals by gently plucking them off. 4) Buy a boa from a craft store, or steal it from your kid's closet or your friend's bachelerotte party. Cut off a stretch and rap around the vase to conceal the foam. 5) Use smaller feathers or bits from the boa and insert in four areas of the roses. Voila! 
I originally made this design for an exclusive dinner party, which the venue loved, and the planner did not. I stand by this design and think for a themed party it's fantastic. Why not have some fun, right? I mean, shit, it's only flowers! This arrangement is a bit more complicated. Basically, I created a grid using floral tape, cut 4 hydrangeas and inserted in an angle, and then stuck 6 roses in between the hydrangea. Cut off another piece of the boa and insert diagonally. Voila! 
I used leftover hydrangea and orchids for the back vase on the end table, and mini carnations packed densely in a plastic tin cup that's in front of the ipad. 
With a black and white theme, you cannot go wrong. Promise!
Even I, a professional florist, buy flowers at the grocery store when I'm in a rush. Usually these flowers are the lower-end varieties. It's obvious that the flowers are not properly cared for as a lot of them will wilt faster. I usually stick with roses and alstromeria when I buy them. As I talk about in my book, there are many ways to arrange flowers for a bouquet to give to someone. I learned this first at the Empty Vase florist, and really honed my skills while working at Rita Flora. Ah, that seems like a lifetime ago! It seemed as though one day people started wanting me specifically to create their bouquets. At one point, people would form in a big line on Friday night Shabbat to bring flowers as they walked to dinner at someone's house. It was really quite odd, and flattering for me, and this is probably when I started arranging on my own, going from sales girl to a wannabe florist. When you go to the grocery store, have the florist take the flowers out of the package and use cellophane and ribbon to make them look high-end. I always ask to do this myself because it's fun! You should do this for practice! 
First, take a large piece of cellophane and place brown paper or tissue paper on it, and then fold over the cellophane so that the paper is in between to prevent water for destroying it. Buy two bunches of flowers. Strip the leaves off half way. Layer by rows, using odd numbers and placing one type of flower staggered between the other type. 
When you are finished layering, cut the stems on the bottom even so that you will be able to fold the paper together. Bring in both ends of the paper and squeeze together. Use one staple to hold. 
Take a piece of ribbon, and tie it tightly so that the cellophane and paper will bunch together in a pretty way. Tie in a bow. 
Bend back the one side of the cellophane and paper to expose the bouquet. Voila! Gorgeous! (I was at a Ralph's) 
The feast I attended! Pot roast, salad, cauliflower, potatoes and butternut squash soup. Oh, and about four or five bottle of wine:)
|
Click Here for Website Design Services
Photo of Carly right before she got lost in the rainforest.
May 2011.
Categories
All
The Flower Chef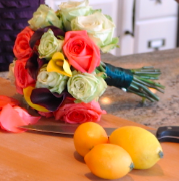
News
How Did She Do That
Editorial

Archives
July 2014
|


